What Goes Into Building a Generative AI App: From Setup to Launch
Understanding the GenAI App Building Process
Building a generative AI application from scratch might sound like something only engineers with deep learning PhDs can do. In reality, the core workflow is structured and methodical. Whether you are a product manager, a consultant, or someone in operations, knowing the basic stages helps you plan realistic timelines, set expectations, and communicate better with technical teams. This article walks through the essential phases: configuring the environment, testing the model, and deploying it so users can actually interact with it.
The focus here is on practical steps, not theory. You do not need to be a developer to follow along. But understanding these stages will give you a clear mental model of what a GenAI app building course typically covers. And if you are considering a short, intensive programme to get hands-on experience, knowing the process helps you pick the right training.
Stage 1: Configuring the Development Environment
Before any code is written, you need a workspace that can run large language models or other generative models. This stage is often underestimated. It involves selecting a cloud service or a local machine with enough GPU memory, installing the right libraries (like PyTorch, TensorFlow, or Hugging Face Transformers), and setting up version control so you can track changes.
Configuration also includes defining the model architecture. Are you fine-tuning an existing open-source model or building a simple retrieval-augmented generation (RAG) pipeline? Each choice affects the environment setup. For example, a RAG pipeline requires a vector database and an embedding model, while a fine-tuning job needs a training dataset in a specific format.
Many beginners skip the step of creating a virtual environment. That is a mistake. Without isolation, two projects can conflict on library versions, leading to hours of debugging. A good configuration stage ends with a reproducible setup: a requirements file or a Docker image that anyone can run without surprises.
Stage 2: Selecting and Preparing the Data
Generative AI models are nothing without the data that shapes their output. In this stage, you gather, clean, and structure the data that the model will learn from or retrieve answers from. For a simple app like a customer support chatbot, you might compile product manuals, FAQ pages, and past support tickets.
Data preparation involves splitting the text into chunks, removing duplicates, and ensuring the formatting is consistent. If you are fine-tuning, you need pairs of input and expected output. If you are building a RAG system, you need to embed the chunks and store them in a vector database such as Chroma or Pinecone.
One common pitfall is ignoring data quality. Garbage in, garbage out is especially true for generative models. A single mislabelled example can skew the model's behaviour. Spend time on this stage, and test a small sample of your data before moving on.
Stage 3: Prototyping and Initial Testing
With the environment ready and data prepared, you can start prototyping. This stage is about getting a minimal working version of the app. You might use a pre-trained model from Hugging Face and write a few lines of code to send a prompt and receive a generated response.
Testing at this point is informal. You run the app on a few sample inputs, see what comes out, and tweak the prompt template or the model parameters (like temperature and max tokens). The goal is not perfection but proof of concept. Does the model answer in the right tone? Does it stay on topic? If not, you adjust the instructions or choose a different base model.
This is also the stage to experiment with different prompting strategies. Few-shot prompting, chain-of-thought reasoning, or system messages can dramatically change output quality without any code changes. Document what works and what does not; it saves time later.
Stage 4: Rigorous Evaluation and Refinement
Once you have a prototype that mostly works, you need to evaluate it systematically. This stage separates a hobby project from a production-ready app. Evaluation can be automated or manual. Automated checks might include measuring how often the model's output matches a known answer. Manual checks involve humans rating responses for helpfulness, safety, and accuracy.
For a generative AI app, evaluation is tricky because there is often no single correct answer. You need to define what "good enough" means for your use case. For example, if the app is a creative writing assistant, a bit of variety is fine. If it is a medical Q&A bot, the tolerance for error is near zero.
Refinement involves iterating on the data, the prompt, or even the model choice. You might add more examples to the training set, adjust the chunk size in the RAG pipeline, or switch to a smaller model that runs faster. Track each change's impact on the evaluation metrics so you do not go in circles.
Stage 5: Deployment and Monitoring
Deployment means making the app available to users. This can be as simple as running the app on a cloud server with an API endpoint, or as complex as integrating it into an existing enterprise system. You need to consider latency, cost, and security. Generative AI models can be expensive to run at scale, so you might cache common responses or use a smaller model for simple queries.
Monitoring is an often overlooked final stage. After deployment, you need to track how the app behaves in the wild. Are users getting good answers? Are there any harmful outputs? Logging inputs and outputs (with user consent) helps you catch issues early. You also need a plan for updating the model as new data comes in or as the base models improve.
Many teams find that the first deployment is just the beginning. The app will need ongoing maintenance, especially if the underlying data changes. But a well-planned deployment gives you a solid foundation to build on.
How a Structured Course Helps You Learn This Process
Learning these stages by yourself is possible, but it takes time and a lot of trial and error. A structured GenAI app building course can compress that learning curve. One example is the programme offered by United Ceres College in Singapore, where professionals spend two days building and deploying a simple generative AI application. The course is designed to take you through the exact stages described here: from environment setup to deployment, with hands-on exercises at each step.
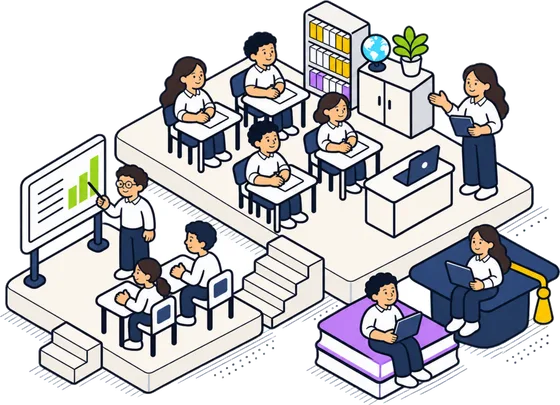
What makes such a course valuable is the guided practice. Instead of reading about RAG pipelines, you actually build one. Instead of troubleshooting library conflicts alone, you have an instructor who has seen those errors before. And you walk away with a working app that you can show to stakeholders or adapt for your own work. United Ceres College focuses on practical outcomes, so the course emphasises the testing and deployment stages that are often glossed over in online tutorials.
What This Means for You
Whether you attend a course or learn on your own, the basic stages of building a GenAI app are the same. Start with configuration, move through data preparation and prototyping, then evaluate rigorously before deploying. Each stage has its own challenges, but none of them are magic. With a clear plan and a willingness to iterate, you can turn a generative AI idea into a working tool that solves real problems.
The field is moving fast, but the fundamentals remain stable. Understanding the workflow now gives you a framework that will serve you whether you are building a simple chatbot or a complex multi-agent system. And if you ever feel stuck, remember that every professional started with the same first step: setting up their environment and running their first prompt.
United Ceres College on social media
 Twitter
 LinkedIn
 Facebook
 Instagram
 YouTube